This post will describe how to host a sphinx-powered site (using the Read the Docs theme) on your own GitHub Pages site, built with GitHub’s free CI/CD tools.
ⓘ Note: If you don’t care about how this works and you just want to make a functional repo, you can just fork my ‘rtd-github-pages’ GitHub repo.
This is part one of a two-part series. For part two, see Continuous Documentation: Hosting Read the Docs on GitHub Pages (2/2)
Motivation & History
Documentation is a critical component of any open-source project. Most of my professional experience as a Linux Systems Administrator meant writing documentation in confluence, MediaWiki, or a plaintext README stuck in a git repo.
Now that I’m building an open-source GUI app for multiple Operating Systems (one to which I don’t even have physical access), I’ve had to wear-in my developer hat. I’ve learned Git Flow, Gitlab CI/CD, and GitHub Actions (ok, I guess I’m still pretty DevOps-heavy).
Anyway, when I push my code up to github.com, GitHub Actions automatically spins-up Windows, Linux, and MacOS instances in their cloud that build my application for all three platforms. And, since my project is open-source, it’s all totally free. Pretty neat.
When it came time for me to document my code, I wanted a similar CI/CD pipeline to build my documentation. Specifically, I wanted something that would
- have built-in support for generating my documentation to multiple formats that could be easily consumed on many devices: from physical A4 paper to PDFs to html (responsively rendering for mobile and desktops) to an epub for e-ink devices
- produce multiple versions of documentation that automatically matched each release version of our software
- be powerful enough to stitch spreadsheets into the documentation, so I could add a Bill of Materials for open-source hardware products, including cells with formulas for dynamically calculating sums
- be flexible enough to embed videos that play great on web browsers and gracefully fall-back to QR-codes linking to the video when printed to paper
- And, most importantly, would be mostly plaintext so it plays well with a VCS like git
What I wanted was to treat my documentation-as-code and setup a “Continuous Documentation” workflow. It didn’t take me long to discover Read the Docs, which met most of my requirements.
Read the Docs (rtd) is a django-powered service for hosting free documentation for open-source projects. It was first released in 2010 by Eric Holscher (co-founder of Write the Docs). It’s built-on sphinx, which was released two years earlier to build docs.python.org.
Ten years after rtd launched, github.com made GitHub Actions available to the general public. This means that it’s now possible to host a near-equivalent Read the Docs site using GitHub Pages!
Unfortunately, I found that a lot of these technologies (Sphinx, reST, Read the Docs, GitHub Pages) weren’t very intuitive and some of their documentation (surprisingly) wasn’t complete.
So if you’re looking to use Sphinx or Read the Docs to host your documentation using GitHub Pages, this guide will walk you through the process 🙂
Assumptions
This guide was written in July 2020, and it uses the following software and versions:
- debian 10 (buster)
- git 2.20.1
- sphinx 1.8.4
- sphinx-rtd-theme 0.4.3
Repository Setup
This section will describe how to setup a repository with a simple Hello World python application and add a ‘docs/` dir, which will include our sphinx sources that GitHub Actions will use to generate our static site content.
git init
Before proceeding with this step, you’ll need to install git. If you’re using a Debian-based distro, you can do so with the following command.
sudo apt-get install -y git
First, let’s create a fresh git repo and add an example `helloWorld.py` python script which will serve as the example project that we want to document using sphinx.
user@host:~$ mkdir rtd-github-pages
user@host:~$ cd rtd-github-pages/
user@host:~/rtd-github-pages$ git init
Initialized empty Git repository in /home/user/rtd-github-pages/.git/
user@host:~/rtd-github-pages$ mkdir src
user@host:~/rtd-github-pages$ echo "print('Hello World')" > src/helloWorld.py
user@host:~/rtd-github-pages$ git add .
user@host:~/rtd-github-pages$ git commit -am "added our code"
[master (root-commit) 25aeebf] added our code
 1 file changed, 1 insertion(+)
 create mode 100644 src/helloWorld.py
user@host:~/rtd-github-pages$
sphinx-quickstart
Before proceeding with this step, you’ll need to install sphinx. If you’re using a Debian-based distro, you can do so with the following command.
sudo apt-get install -y python3-sphinx
Now, let’s create a ‘docs/‘ dir in our git repo’s root and run `sphinx-quickstart` to setup our sphinx site. For more info on how to answer the interactive prompts, see the sphinx-quickstart documentation.
user@host:~/rtd-github-pages$ mkdir docs
user@host:~/rtd-github-pages$ cd docs
user@host:~/rtd-github-pages/docs$ sphinx-quickstart
Welcome to the Sphinx 1.8.4 quickstart utility.

Please enter values for the following settings (just press Enter to
accept a default value, if one is given in brackets).

Selected root path: .

You have two options for placing the build directory for Sphinx output.
Either, you use a directory "_build" within the root path, or you separate
"source" and "build" directories within the root path.
> Separate source and build directories (y/n) [n]:

Inside the root directory, two more directories will be created; "_templates"
for custom HTML templates and "_static" for custom stylesheets and other static
files. You can enter another prefix (such as ".") to replace the underscore.
> Name prefix for templates and static dir [_]:

The project name will occur in several places in the built documentation.
> Project name: helloWorld
> Author name(s): Michael Altfield
> Project release []: 1.0.0

If the documents are to be written in a language other than English,
you can select a language here by its language code. Sphinx will then
translate text that it generates into that language.

For a list of supported codes, see
http://sphinx-doc.org/config.html#confval-language.
> Project language [en]:

The file name suffix for source files. Commonly, this is either ".txt"
or ".rst".  Only files with this suffix are considered documents.
> Source file suffix [.rst]:

One document is special in that it is considered the top node of the
"contents tree", that is, it is the root of the hierarchical structure
of the documents. Normally, this is "index", but if your "index"
document is a custom template, you can also set this to another filename.
> Name of your master document (without suffix) [index]:
Indicate which of the following Sphinx extensions should be enabled:
> autodoc: automatically insert docstrings from modules (y/n) [n]: y
> doctest: automatically test code snippets in doctest blocks (y/n) [n]:
> intersphinx: link between Sphinx documentation of different projects (y/n) [n]:
> todo: write "todo" entries that can be shown or hidden on build (y/n) [n]:
> coverage: checks for documentation coverage (y/n) [n]:
> imgmath: include math, rendered as PNG or SVG images (y/n) [n]:
> mathjax: include math, rendered in the browser by MathJax (y/n) [n]:
> ifconfig: conditional inclusion of content based on config values (y/n) [n]:
> viewcode: include links to the source code of documented Python objects (y/n) [n]: y
> githubpages: create .nojekyll file to publish the document on GitHub pages (y/n) [n]: y

A Makefile and a Windows command file can be generated for you so that you
only have to run e.g. `make html' instead of invoking sphinx-build
directly.
> Create Makefile? (y/n) [y]: y
> Create Windows command file? (y/n) [y]:

Creating file ./conf.py.
Creating file ./index.rst.
Creating file ./Makefile.
Creating file ./make.bat.

Finished: An initial directory structure has been created.

You should now populate your master file ./index.rst and create other documentation
source files. Use the Makefile to build the docs, like so:
   make builder
where "builder" is one of the supported builders, e.g. html, latex or linkcheck.

user@host:~/rtd-github-pages/docs$
After finishing the above execution, `sphinx-quickstart` will have generated most of the needed files for you.
user@host:~/rtd-github-pages/docs$ ls
_build  conf.py  index.rst  make.bat  Makefile  _static  _templates
user@host:~/rtd-github-pages/docs$
Local Build
You can now build your documentation’s static html assets with sphinx using `make` and view it using `firefox`.
user@host:~/rtd-github-pages/docs$ make html
Running Sphinx v1.8.4
making output directory...
building [mo]: targets for 0 po files that are out of date
building [html]: targets for 1 source files that are out of date
updating environment: 1 added, 0 changed, 0 removed
reading sources... [100%] index
looking for now-outdated files... none found
pickling environment... done
checking consistency... done
preparing documents... done
writing output... [100%] index
generating indices... genindex
writing additional pages... search
copying static files... done
copying extra files... done
dumping search index in English (code: en) ... done
dumping object inventory... done
build succeeded.

The HTML pages are in _build/html.
user@host:~/rtd-github-pages/docs$ firefox _build/html/index.html &
[1] 13589
user@host:~/rtd-github-pages/docs$
After executing the `firefox` command above, you should see your sphinx-rendered html documentation.
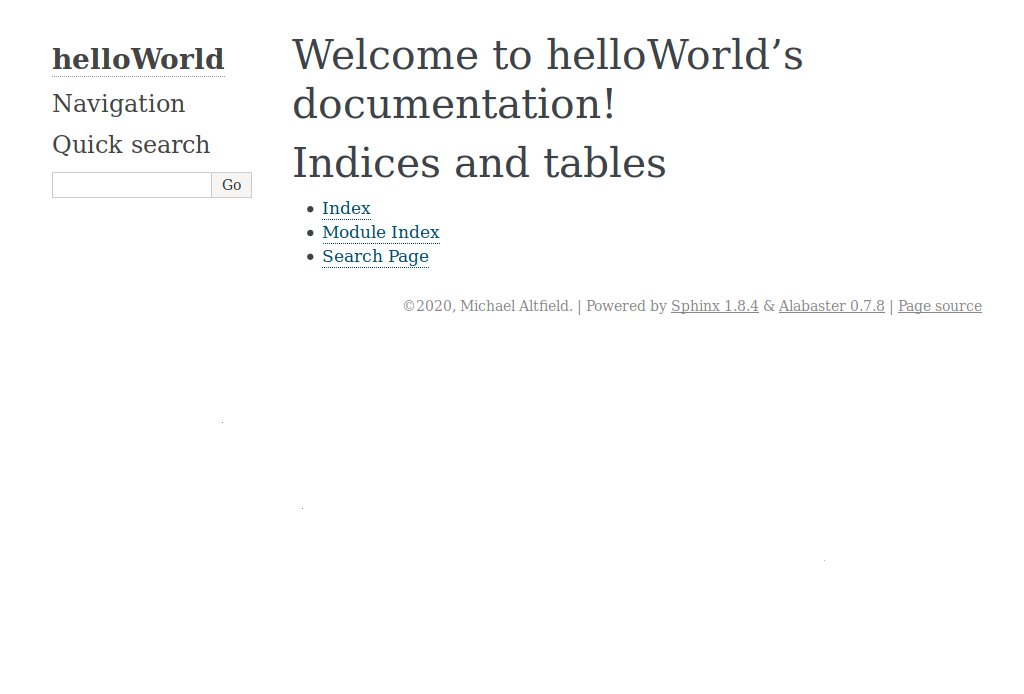
The default sphinx theme is alabaster
Backup conf.py
Before we start editing our sphinx ‘conf.py‘ configuration file, it would be a good idea to make a backup.
user@host:~/rtd-github-pages/docs$ cp conf.py conf.py.orig
user@host:~/rtd-github-pages/docs$
user@host:~/rtd-github-pages/docs$ ls
_build   conf.py.orig  make.bat  _static
conf.py  index.rst     Makefile  _templates
user@host:~/rtd-github-pages/docs$
Change Theme to Read the Docs
By default, the sphinx theme will be set to ‘alabaster‘. To change this to the Read the Docs theme, we need to update the `conf.py` file.
Before proceeding with this step, you’ll need to install the Read the Docs theme. If you’re using a Debian-based distro, you can do so with the following command:
sudo apt-get install -y python3-sphinx-rtd-theme
Now we change the theme from ‘alabaster‘ to ‘sphinx_rtd_theme‘
user@host:~/rtd-github-pages/docs$ grep -A2 extensions conf.py
...
# extensions coming with Sphinx (named 'sphinx.ext.*') or your custom
# ones.
extensions = [
    'sphinx.ext.autodoc',
    'host.ext.viewcode',
user@host:~/rtd-github-pages/docs$ grep html_theme conf.py
html_theme = 'alabaster'
# html_theme_options = {}
user@host:~/rtd-github-pages/docs$

user@host:~/rtd-github-pages/docs$ grep sphinx_rtd_theme conf.py || (sed -i "s%^extensions = \[%extensions = \[\n    'sphinx_rtd_theme',%" conf.py && sed -i "s%^\(html_theme = 'alabaster'\)%#\1\nhtml_theme = 'sphinx_rtd_theme'%" conf.py)
user@host:~/rtd-github-pages/docs$

user@host:~/rtd-github-pages/docs$ grep -A2 extensions conf.py
...
# extensions coming with Sphinx (named 'sphinx.ext.*') or your custom
# ones.
extensions = [
    'sphinx_rtd_theme',
    'sphinx.ext.autodoc',
user@host:~/rtd-github-pages/docs$ grep html_theme conf.py
#html_theme = 'alabaster'
html_theme = 'sphinx_rtd_theme'
# html_theme_options = {}
user@host:~/rtd-github-pages/docs$
You should now be able to rebuild your documentation’s html and view it with the rtd theme in firefox.
user@host:~/rtd-github-pages/docs$ make clean && make html
Removing everything under '_build'...
Running Sphinx v1.8.4
making output directory...
building [mo]: targets for 0 po files that are out of date
building [html]: targets for 1 source files that are out of date
updating environment: 1 added, 0 changed, 0 removed
reading sources... [100%] index
looking for now-outdated files... none found
pickling environment... done
checking consistency... done
preparing documents... done
writing output... [100%] index
generating indices... genindex
writing additional pages... search
copying static files... done
copying extra files... done
dumping search index in English (code: en) ... done
dumping object inventory... done
build succeeded.

The HTML pages are in _build/html.
user@host:~/rtd-github-pages/docs$ firefox _build/html/index.html &
[1] 14239
user@host:~/rtd-github-pages/docs$
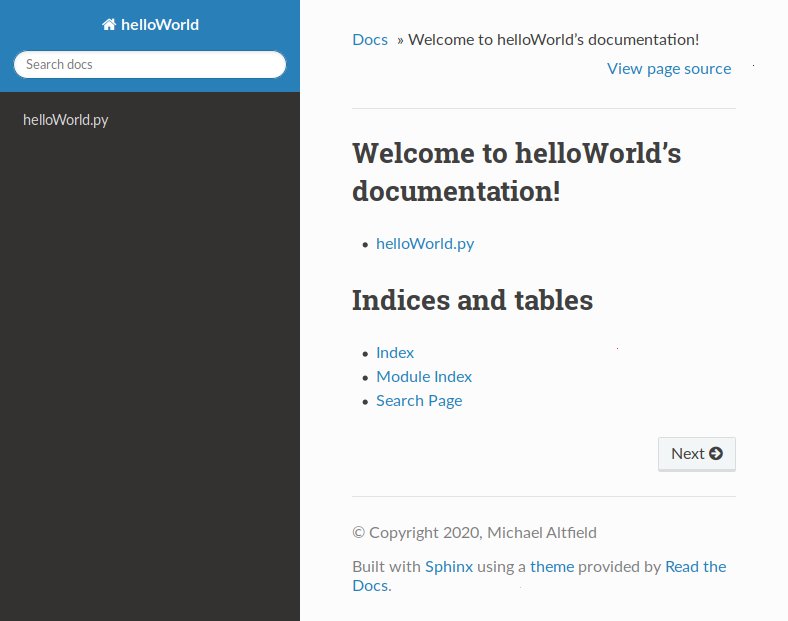
After executing the `firefox` command above, you should see your sphinx-rendered html documentation, this time using the Read the Docs theme.

Fresh install of sphinx using Read the Docs theme
Add Source Code
And just in-case you’re new to sphinx, here we demonstrate how to create a new section of our rtd site that will document our ‘helloWorld.py‘ python script.
First, we have to tell sphinx to include our ‘src/` directory in its PATH.
user@host:~/rtd-github-pages/docs$ tail -n5 conf.py
# A list of files that should not be packed into the epub file.
epub_exclude_files = ['search.html']


# -- Extension configuration -------------------------------------------------
user@host:~/rtd-github-pages/docs$

user@host:~/rtd-github-pages/docs$ grep "sys.path.insert(0, os.path.abspath('../src'))" conf.py || echo -e "\n# add sourcecode to path\nimport sys, os\nsys.path.insert(0, os.path.abspath('../src'))" >> conf.py
user@host:~/rtd-github-pages/docs$

user@host:~/rtd-github-pages/docs$ tail -n5 conf.py
# -- Extension configuration -------------------------------------------------

# add sourcecode to path
import sys, os
sys.path.insert(0, os.path.abspath('../src'))
user@host:~/rtd-github-pages/docs$
Now we create a file called ‘autodoc.rst‘ and add it to the `toctree` table of contents in ‘index.rst‘:
First we create the ‘autodoc.rst‘ file:
cat > autodoc.rst <<EOF
.. _autodoc:

.. contents::

helloWorld.py
=============

.. automodule:: helloWorld
  :members:
  :undoc-members:

EOF
Now we update ‘index.rst‘:
user@host:~/rtd-github-pages/docs$ grep -A4 toctree index.rst
   contain the root `toctree` directive.

Welcome to helloWorld's documentation!
======================================

.. toctree::
   :maxdepth: 2
   :caption: Contents:


user@host:~/rtd-github-pages/docs$ grep autodoc index.rst || perl -pi -0 -w -e 's/(.. toctree::.*?\n\n)/$1   autodoc\n/s' index.rst
user@host:~/rtd-github-pages/docs$

user@host:~/rtd-github-pages/docs$ grep -A4 toctree index.rst
   contain the root `toctree` directive.

Welcome to helloWorld's documentation!
======================================

.. toctree::
   :maxdepth: 2
   :caption: Contents:

  autodoc
user@host:~/rtd-github-pages/docs$
Run the `make clean && make html` to re-build sphinx. And refresh your firefox window.
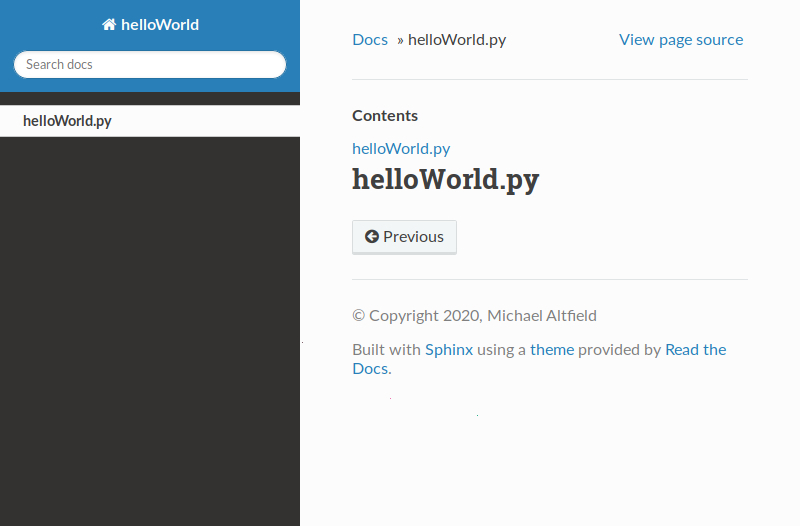
Now you’ll see a link to ‘helloWorld.py‘. If you click it, you’ll the see the html-rendered version of the ‘autodoc.rst‘ file we created above.
The sphinx toc now links to helloWorld.py
Without docstrings, the autodoc produces nothing
Note that the `autodoc` documentation is still empty for our `helloWorld.py` script because it doesn’t have any functions or modules or docstrings. Let’s wrap the `print()` in a function so we can demonstrate how this will look with your code.
user@host:~/rtd-github-pages/docs$ cat ../src/helloWorld.py
print('Hello World')
user@host:~/rtd-github-pages/docs$
Overwrite the existing `helloWorld.py` file shown above with this command:
cat > ../src/helloWorld.py <<EOF
"""This is a very simple helloWorld python script"""
def helloWorld( msg ):
    """
    This is a simple function that prints a message

    Parameters:
       msg (str): The string to print
    """

    print( msg )

helloWorld( 'Hello World' )

EOF
Now build again and refresh firefox. You should now see `autodoc` doing its magic.

With docstrings, our helloWorld.py script and its functions are automatically documented
Build Script
Now that our documentation sources are all setup, let’s create a build script. This `buildDocs.sh` script will be executed in a ‘debian:buster-slim‘ docker container in GitHub’s cloud.
This script takes about 1-2 minutes to run. GitHub gives 2,000 free “Actions minutes” per month*
Later we’ll setup the workflow that tells GitHub to spinup a container to build our docs every time something is pushed to origin. First let’s create the `buildDocs.sh` script:
cat > buildDocs.sh <<'EEOOFF'
#!/bin/bash
set -x
################################################################################
# File:    buildDocs.sh
# Purpose: Script that builds our documentation using sphinx and updates GitHub
#          Pages. This script is executed by:
#            .github/workflows/docs_pages_workflow.yml
#
# Authors: Michael Altfield <michael@michaelaltfield.net>
# Created: 2020-07-17
# Updated: 2020-07-17
# Version: 0.1
################################################################################

###################
# INSTALL DEPENDS #
###################

apt-get update
apt-get -y install git rsync python3-sphinx python3-sphinx-rtd-theme

#####################
# DECLARE VARIABLES #
#####################

pwd
ls -lah
export SOURCE_DATE_EPOCH=$(git log -1 --pretty=%ct)

##############
# BUILD DOCS #
##############

# build our documentation with sphinx (see docs/conf.py)
# * https://www.sphinx-doc.org/en/master/usage/quickstart.html#running-the-build
make -C docs clean
make -C docs html

#######################
# Update GitHub Pages #
#######################

git config --global user.name "${GITHUB_ACTOR}"
git config --global user.email "${GITHUB_ACTOR}@users.noreply.github.com"

docroot=`mktemp -d`
rsync -av "docs/_build/html/" "${docroot}/"

pushd "${docroot}"

# don't bother maintaining history; just generate fresh
git init
git remote add deploy "https://token:${GITHUB_TOKEN}@github.com/${GITHUB_REPOSITORY}.git"
git checkout -b gh-pages

# add .nojekyll to the root so that github won't 404 on content added to dirs
# that start with an underscore (_), such as our "_content" dir..
touch .nojekyll

# Add README
cat > README.md <<EOF
# GitHub Pages Cache

Nothing to see here. The contents of this branch are essentially a cache that's not intended to be viewed on github.com.


If you're looking to update our documentation, check the relevant development branch's 'docs/' dir.

For more information on how this documentation is built using Sphinx, Read the Docs, and GitHub Actions/Pages, see:

 * https://tech.michaelaltfield.net/2020/07/18/sphinx-rtd-github-pages-1
EOF

# copy the resulting html pages built from sphinx above to our new git repo
git add .

# commit all the new files
msg="Updating Docs for commit ${GITHUB_SHA} made on `date -d"@${SOURCE_DATE_EPOCH}" --iso-8601=seconds` from ${GITHUB_REF} by ${GITHUB_ACTOR}"
git commit -am "${msg}"

# overwrite the contents of the gh-pages branch on our github.com repo
git push deploy gh-pages --force

popd # return to main repo sandbox root

# exit cleanly
exit 0
EEOOFF
chmod +x buildDocs.sh
When I first designed the above script, I was expecting that the GitHub Pages API would have some POST endpoint defined where I could upload the contents of the page-to-be. No such API call exists.
Instead, I found that the best way to update GitHub Pages is to push the static site’s content to a special branch called ‘gh-pages‘. With this setup, the root of the ‘gh-pages‘ branch in your repo effectively becomes your GitHub Pages document root, and pushing changes to it triggers your site to be updated.
GitHub Actions Workflow
Now let’s setup our GitHub Actions workflow file, which will tell github.com when and how to execute the above script that will update our documentation site.
mkdir -p ../.github/workflows/
cat > ../.github/workflows/docs_pages_workflow.yml <<'EOF'
name: docs_pages_workflow
# execute this workflow automatically when a we push to master
on:
push:
branches: [ master ]
jobs:
build_docs_job:
runs-on: ubuntu-latest
container: debian:buster-slim
steps:
- name: Prereqs
env:
GITHUB_TOKEN: ${{ secrets.GITHUB_TOKEN }}
run: |
apt-get update
apt-get install -y git
git clone --depth 1 "https://token:${GITHUB_TOKEN}@github.com/${GITHUB_REPOSITORY}.git" .
shell: bash
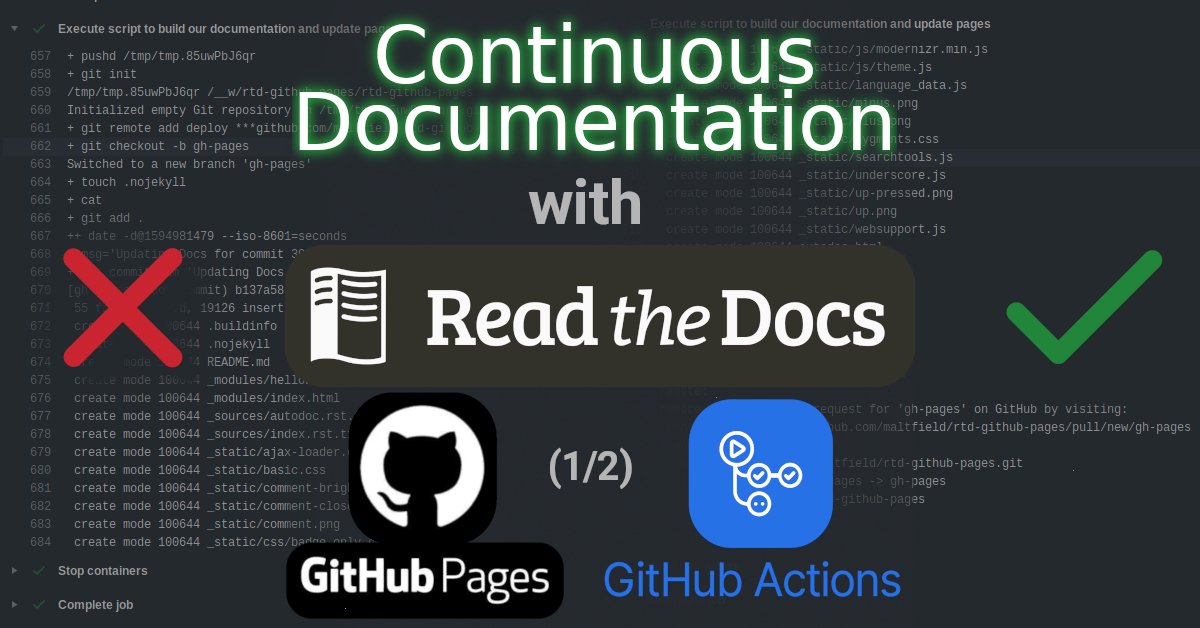
- name: Execute script to build our documentation and update pages
env:
GITHUB_TOKEN: ${{ secrets.GITHUB_TOKEN }}
run: "docs/buildDocs.sh"
shell: bash
EOF
The above yaml file is pretty straight-forward. The only awkward part is the catch-22 requiring there to be two steps: we can’t execute the script until we clone the repo first, and we can’t clone the repo (with write-access) until we install `git`. Once those essential prerequisites are satisfied, we just execute the `docs/buildDocs.sh` script.
For more information on the syntax of this file, see Syntax Reference for GitHub Workflow Files.
Pushing to GitHub
At this point, the contents of the repo is complete.
Go up one directory. The remaining commands should be executed in the root of your repo, not in the ‘docs/‘ directory.
user@host:~/rtd-github-pages/docs$ cd ..
user@host:~/rtd-github-pages$
From the root of your repo, let’s setup a ‘.gitignore‘ to not track our locally-built ‘_build‘ directory, ‘__pycache__‘ , and a few other sphinx-related cache files.
cat > docs/.gitignore <<EOF
*.swp
/_build
/doctrees
EOF

cat > .gitignore <<EOF
__pycache__
*.pyc
EOF
And, finally, let’s add all the files and commit our changes.
user@host:~/rtd-github-pages$ git add .
user@host:~/rtd-github-pages$ git commit -am "finished setting up rtd for github pages https://tech.michaelaltfield.net/2020/07/18/sphinx-rtd-github-pages-1"
[master 9ac183a] finished setting up rtd for github pages https://tech.michaelaltfield.net/2020/07/18/sphinx-rtd-github-pages-1
 11 files changed, 584 insertions(+), 1 deletion(-)
 create mode 100644 .github/workflows/docs_pages_workflow.yml
 create mode 100644 .gitignore
 create mode 100644 docs/.gitignore
 create mode 100644 docs/Makefile
 create mode 100644 docs/autodoc.rst
 create mode 100644 docs/buildDocs.sh
 create mode 100644 docs/conf.py
 create mode 100644 docs/conf.py.orig
 create mode 100644 docs/index.rst
 create mode 100644 docs/make.bat
user@host:~/rtd-github-pages$
Next, login to your github.com account and create a new repository.
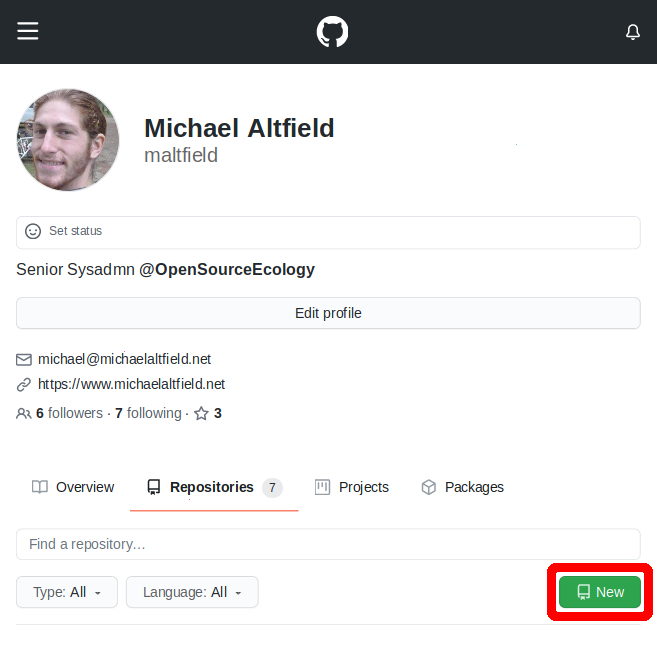
Click “New” to create a new repository

Fill-in the required fields and click “Create repository”
Get the ssh URL to your new repo and append it to the `git remote add origin` command.

Click “Code” to get the URL of the repo
Execute the following commands to push your local repo to github.com (making sure to replace `git@github.com:maltfield/rtd-github-pages.git` with your repo).
git remote add origin git@github.com:maltfield/rtd-github-pages.git
git push origin master --force
Confirm Build Success
At this point, all of your changes should be pushed-up to github.com, and your GitHub Actions should already be building your static site!
Refresh your repo in your browser on github.com to see your files.
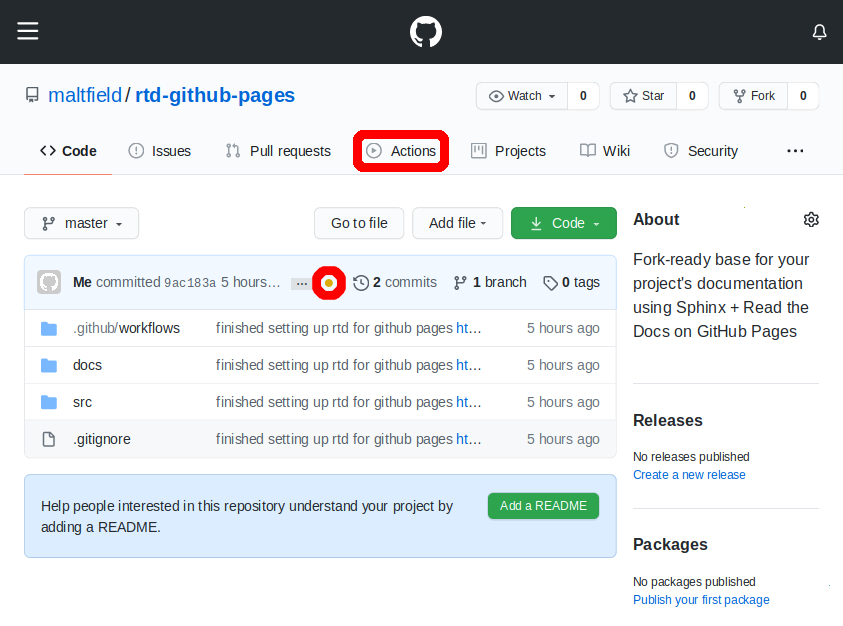
Click “Actions” for documentation build logs
You should see a yellow circle or a green checkbox appear next to your commit at the top of your repo’s files header. This indicates the state of the GitHub Actions job building your documentation.
You can get more detail, including the the output from the execution of the `buildDoc.sh` bash script, by clicking the “Actions” button in the navbar -> clicking your most recent commit -> clicking the ‘build_docs_job‘ under ‘docs_pages_workflow‘
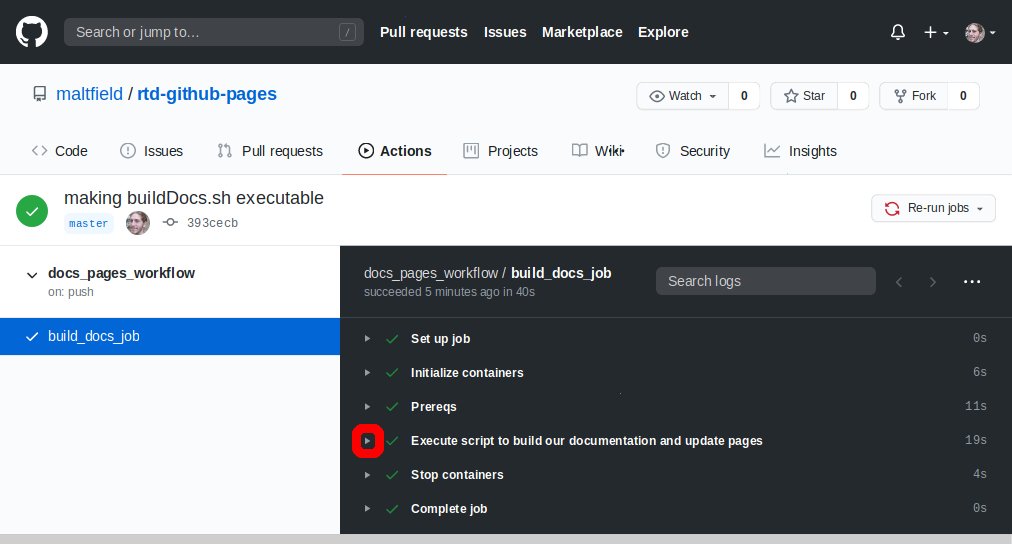
Click the accordion expand button to view the build log
You can expand each of the build steps, which coorelate directly to the `.github/workflows/docs_pages_workflow.yml` file we created above.
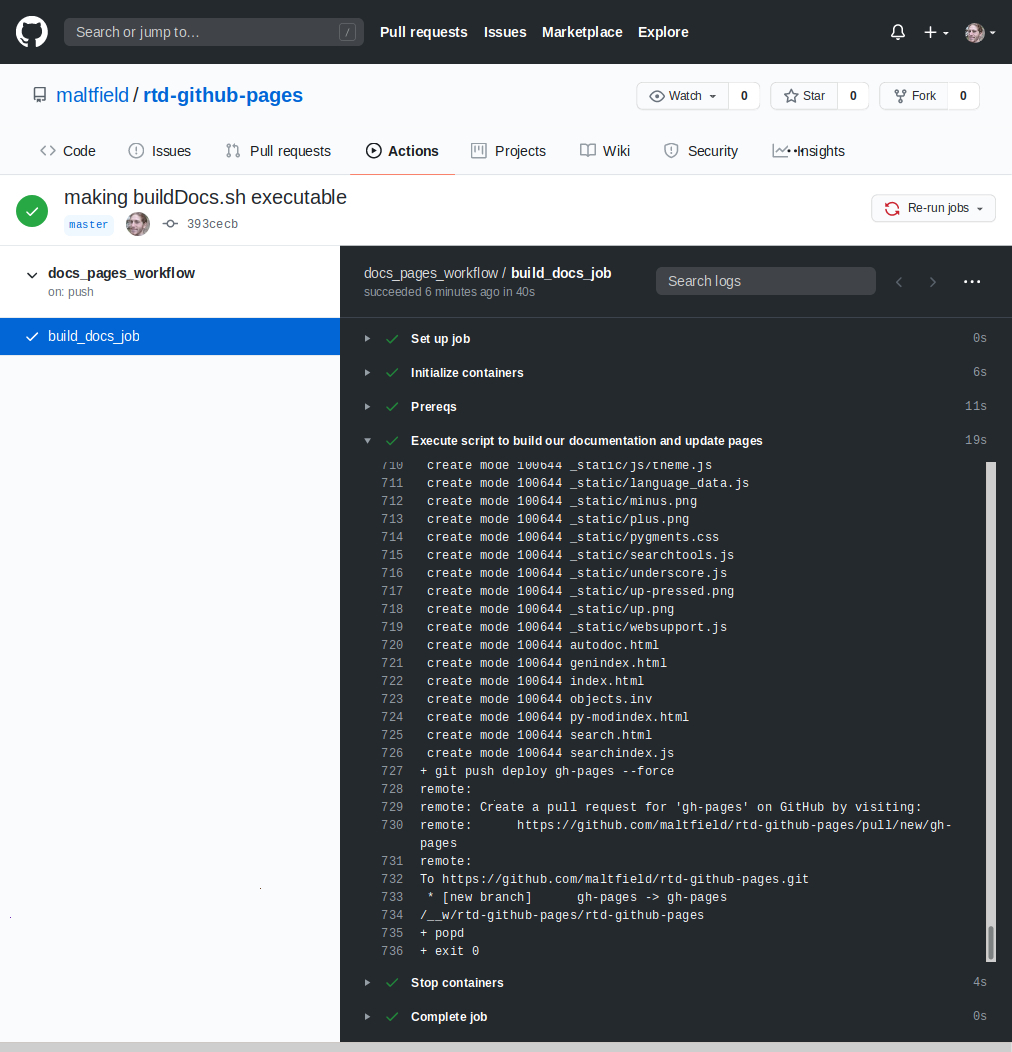
GitHub Actions output from ‘buildDoc.sh’ exectuion
Now click the “Code” button in the navbar to go back to browsing the files.
If you click the branch drop-down menu to display all the branches. You should now see a second branch named ‘gh-pages‘ that was created by the `buildDoc.sh` script. Clicking this branch will show you the docroot of your soon-to-be GitHub Pages site.
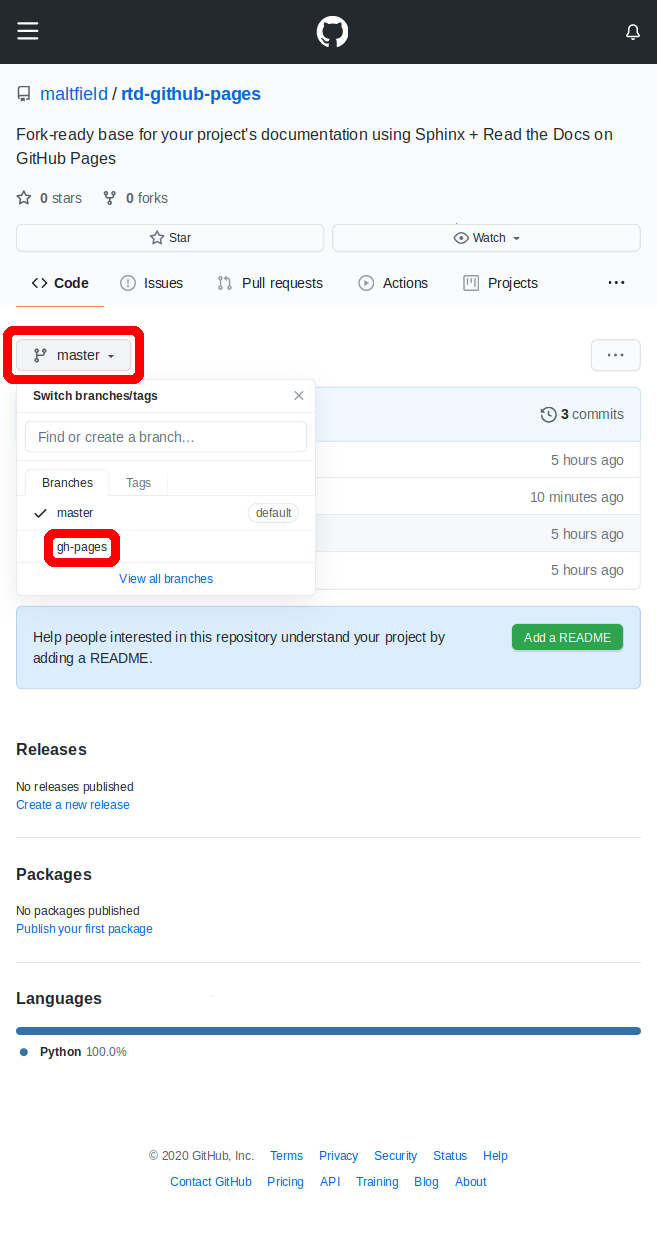
Click the branch drop-down menu and change from “master” to “gh-pages”

The contents of of the “gh-pages” branch is the GitHub Pages docroot
Setup GitHub Pages
Once your documentation build job finishes creating your GitHub Pages static-site files from your sphinx sources into your ‘gh-pages‘ branch, we can enable GitHub Pages for the repo.
Click “Settings” in the navbar and scroll down to “GitHub Pages”.
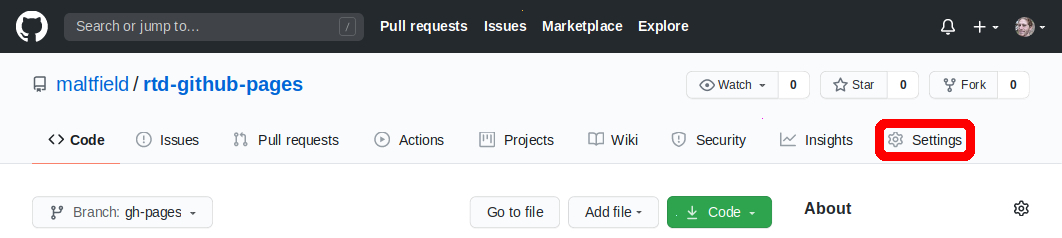
Click “Settings” to configure GitHub Pages
Choose the 'gh-pages' branch from the drop-down menu under “Source,” and a blue box should appear showing you the URL to your new site.
Go ahead and bookmark this URL. It’s where your documentation will be hosted in ~20 minutes.
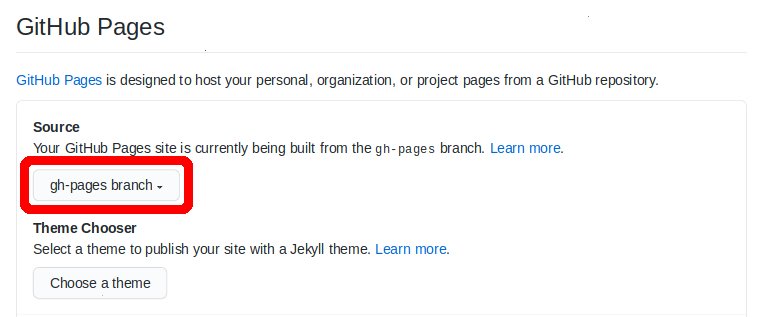
Choose “git-pages branch” from the “Source” drop-down
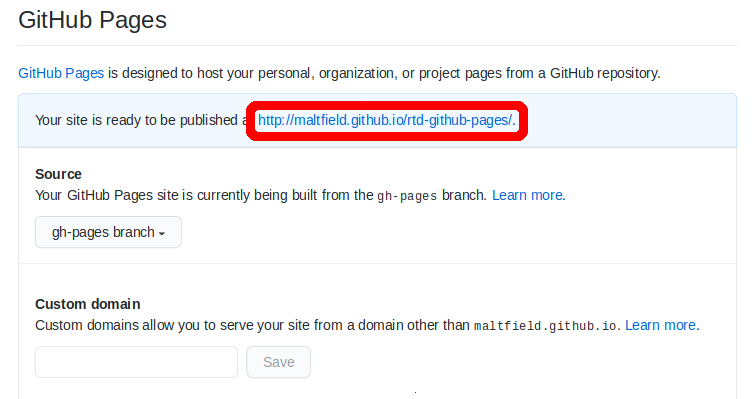
The URL of your GitHub Pages site is displayed
Now, click “Code” in the navbar again.
You should now see a new section titled ‘Environments‘ on the right-hand side of the WUI with a subtitle ‘github-pages‘
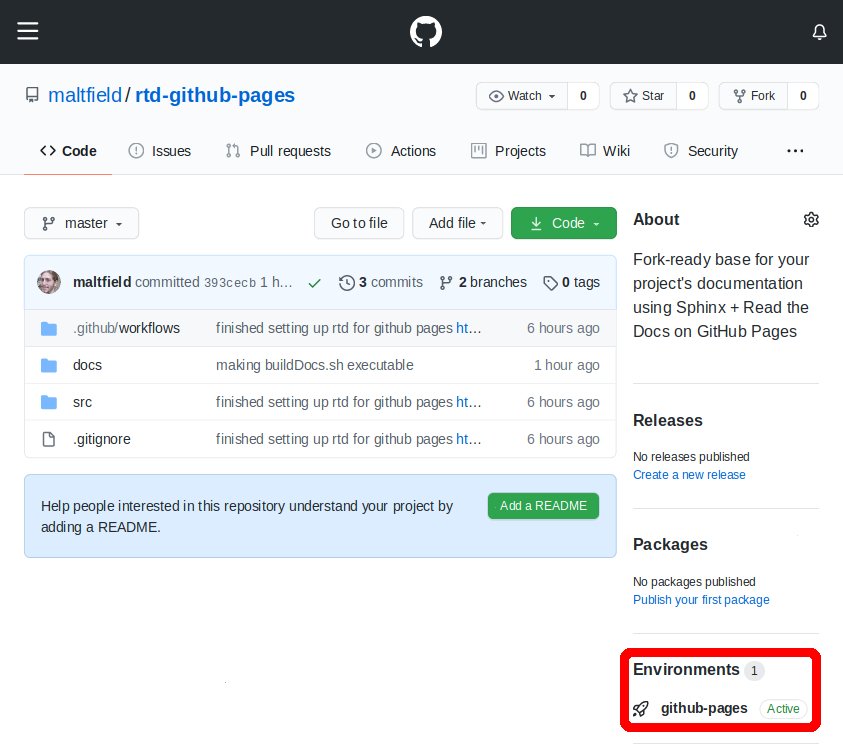
The new “Environments” section shows the GitHub Pages’ build status
If you click the ‘github-pages‘ link under the ‘Environments‘ section, it will show you an ‘Activity log‘ and your GitHub Pages deployment status.
Viewing Your Docs on GitHub Pages
That’s it! Within the next ~20 minutes, your site should be live on GitHub Pages.
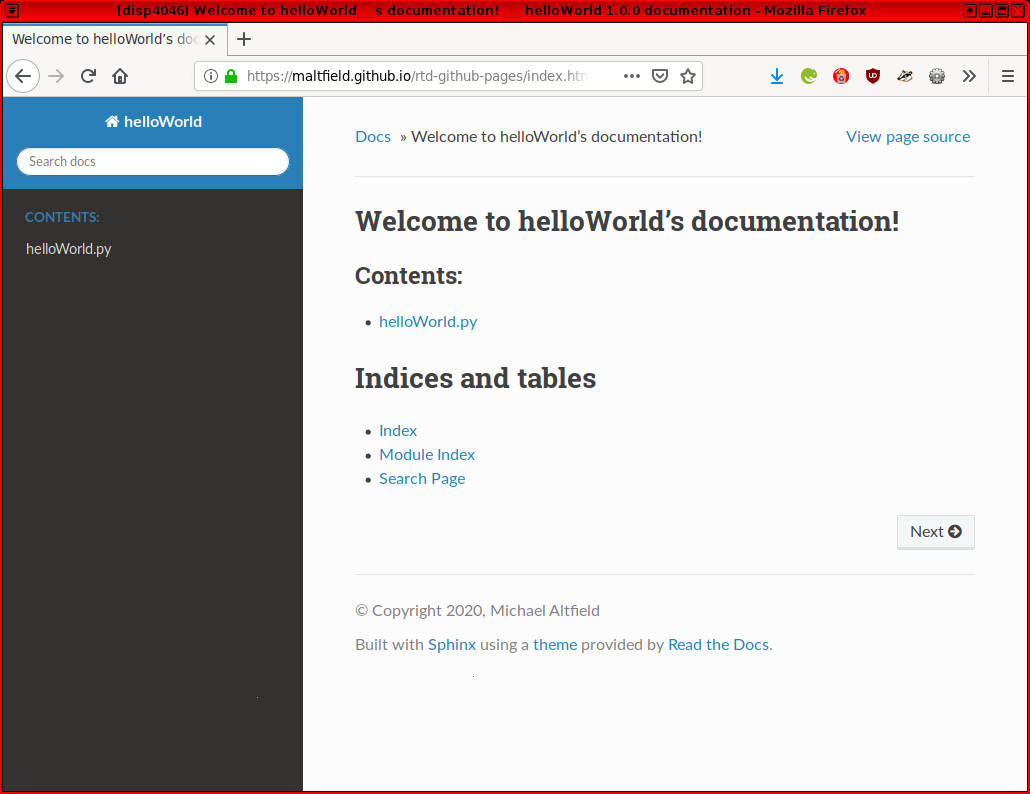
helloWorld documentation live on github.io
And every time you push a commit up to github.com, your site should automatically update within a few minutes.
Checkout part two of this series, where I describe how to add internationlization (i18n), versioning, and PDFs to your GitHub-Pages-powered Read the Docs documentation.
Troubleshooting
This section will provide tips to fixing common issues when setting-up a sphinx-powered GitHub Pages site using GitHub Actions.
No css
If your site is missing static assets (most noticably by lacking css styles), make sure that you have a ‘.nojekyll‘ file at the root of your repo’s ‘gh-pages‘ branch.
GitHub Pages pre-dates GithHub Actions, and it was built mainly to support jekyll-powered static sites. In jekyll, directories that start with an underscore are ignored, so adding this ‘.nojekyll‘ file will tell GitHub Pages not to process your sphinx-generated static content like jekyll-generated static content.
I’ve waited over 20 minutes; my site still 404s
If you’ve waited longer than is reasonable for your site to build, but it still gives you a 404, then try this
- Check the build log of the GitHub Actions ‘
buildDocs.sh‘ script as described above - Check the “Activity log” of your “github-pages” deployments by clicking ‘
github-pages‘ under “Environments” on your repo’s main page. - If you don’t see the above “github-pages” link, then try to change your GitHub Pages section to another source (like ‘
master branch‘) and then change it back to ‘gh-pages branch‘ again
Tips
This section will provide some tips on advanced/custom configurations of a sphinx-powered documentation site on GitHub Pages built via GithHub Actions.
Custom Domain
If you want to host your documentation on a custom domain, then you’ll need to update buildDocs.sh to write-out a CNAME file at the root of your ‘gh-pages‘ branch.
Related Posts


Hi, I’m Michael Altfield. I write articles about opsec, privacy, and devops ➡


Hi Michael,
Some months ago a found about github-pages and Read the Docs as I was looking for a way to create a course site for biodiversity data publishing. I\’m a biologist with some knowledge about git, R and python, but defiantly not a programer. I found github pages course by github to general and unspecific to actually learn how to create the page I need, and the Red the Docs documentation to advanced. Then I found this blog with relieve, as it looks exactly with I need with the fork alternative (with out the need of programming basis). I followed the instructions, nevertheless I didn\’t get the desired outcome (http://camiplata.github.io/rtd-github-pages/). I suspect is something to do with the 2 step \’go to the \”Actions\” tab and click \”I understand my workflows, go ahead and enable them\” to enable GitHub workflows\’, as it looks empty, but I really don\’t know how to proceed now.
First thank you for sharing your knowledge at this blog, second is anything else I should do, some setting to change in order to properly deploy your repository?
Thank you 🙂
Hi Camila,
I think you’re right. When you click on the “Actions” tab, what *do* you see? It should look like this:
* https://raw.githubusercontent.com/maltfield/rtd-github-pages/347ec2ed9522d3b5ec6e3e89f0d53bdcee86788b/docs/_static/sphinx-rtd-github-pages-1_enableActions.jpg
Can you please upload a screenshot and send me a link to it?
Cheers,
Michael
Thank you for your promt reply,
The first time a went to actions a saw what your are showing me at the screenshot, I enable the workflows, for a while it looked like something was running but after it a got an empty actions page see: https://drive.google.com/file/d/1AIUPvR2fAXRAR5swiLdIS2P6QUtTDCsx/view?usp=sharing
While writing this answer I read the advance explanation in your blog and realize the default security was https, and not SSH, I made the change and not its working https://camiplata.github.io/rtd-github-pages/en/master/. Now I will procede to do some changes and if those are reflected automatically.
The actions tab still looks ’empty’ like the screenshot I just shared, will this be a problem in the future?
Best
C.
Glad you got it working 🙂 I guess the issue was that it wasn’t clear that you had to push *something* to github.com to trigger your pages to be built. You can do that over https or ssh.
Your actions are visible to me:
* https://github.com/camiplata/rtd-github-pages/actions
* https://imgur.com/a/ab3O0Tt
Hi! Very helpful guide. Question, though: Is this really using RTD if it\’s just the sphinx-rtd-theme?
I ask because I understand RTD to be a hosting/CI service first and foremost, but we\’re doing the hosting/CI using GitHub instead of using RTD, so I\’m not sure it\’s accurate to say RTD is a part of this.
Thanks again!
Hi Joshua. You’re correct, the only thing RTD about this is that the sphinx theme it’s using was developed and released by RTD. So for most people reading the documentation, it’s an almost identical UX to RTD. The backend, however, is entirely distinct.
I was struggling to find anything understandable to do all this and your explanations allowed me to everything I wanted. Thank you so much.
Michael, you are a legend! This is exactly what I needed. Kudos to you sir!
Does this only work for public repos? Is github pages allowed for non-public free accounts?